

Setup Guide
Tracer needs a root certificate to decrypt HTTPS traffic. Follow the steps below to generate, install, and trust a local certificate.
By generating the certificate on your device - nobody else, including us, can use it to read your traffic.
Step 1 — Install the certificate
- In Tracer, tap INSTALL on the first checklist step. An in-app browser opens and you will be prompted to download a configuration profile. Tap ALLOW. (The address bar shows 127.0.0.1 — indicating the certificate is generated on device.)
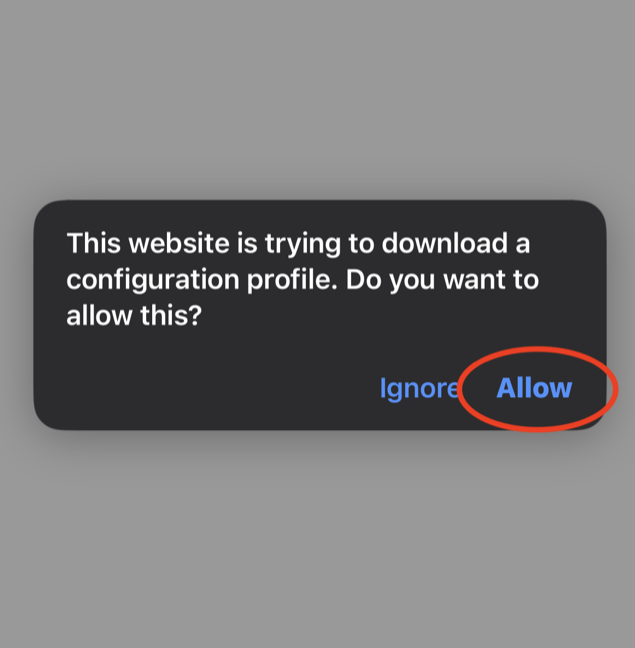
- iOS confirms with "Profile Downloaded". Tap CLOSE, then DONE to leave the browser.
- Open the SETTINGS app. Near the top you'll see PROFILE DOWNLOADED — tap it. (If it isn't there, look under Settings → General → VPN & Device Management, then tap "Tracer HTTPS Certificate".)
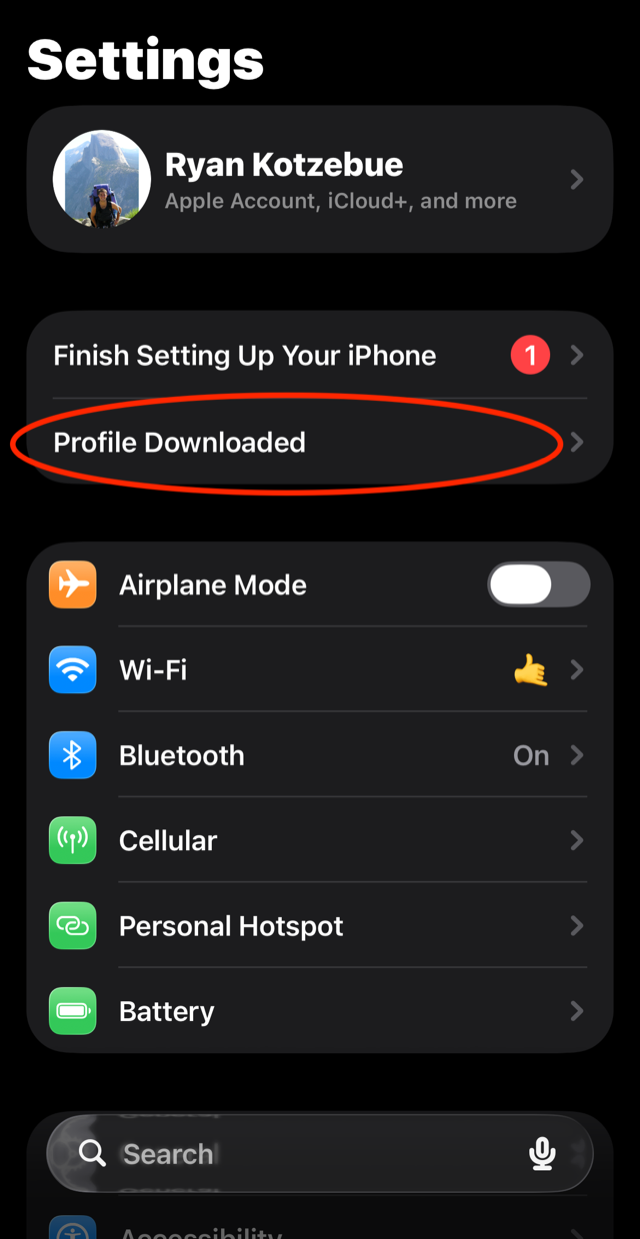
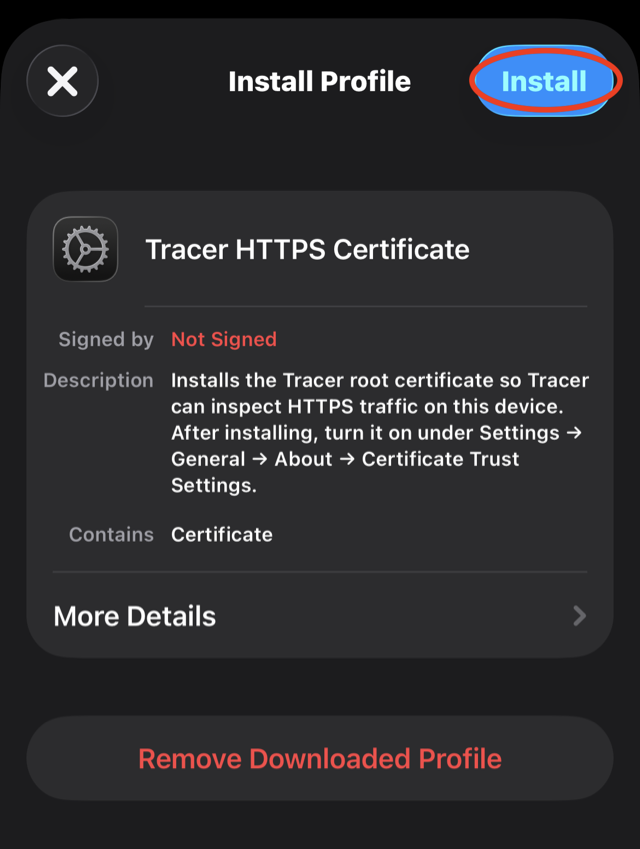
- On the "Install Profile" screen you'll see the Tracer HTTPS Certificate. Tap INSTALL in the top-right corner. You may be prompted for your passcode.
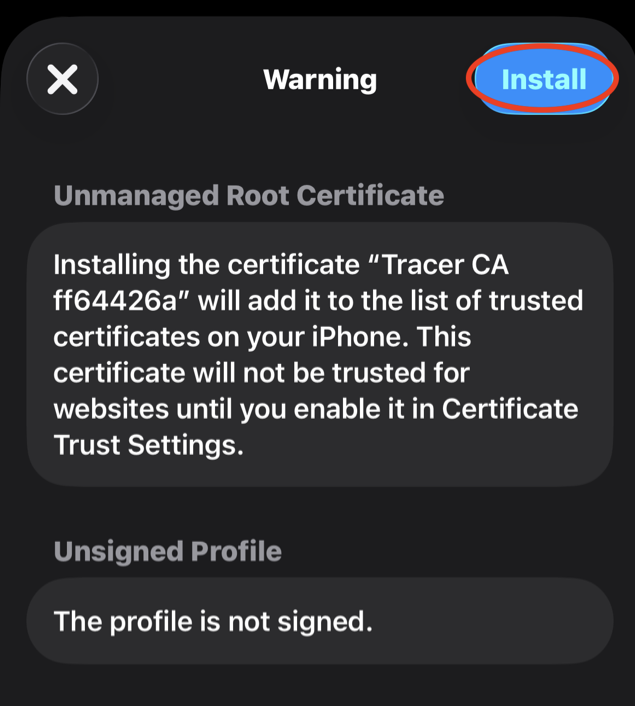
- iOS shows a Warning screen. This is expected — the certificate was generated on your device moments ago, so no outside authority has signed it. Tap INSTALL again, then DONE.
Step 2 — Trust the certificate
- Go to SETTINGS → GENERAL → ABOUT.
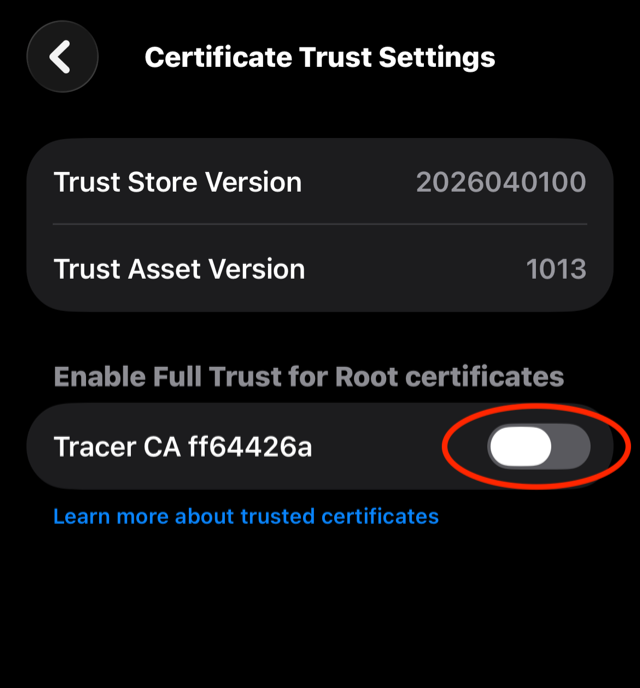
- Scroll to the VERY BOTTOM and tap CERTIFICATE TRUST SETTINGS.
- Turn on the switch to "Enable Full Trust for Root certificates" for "Tracer CA …" (yours has its own unique suffix).
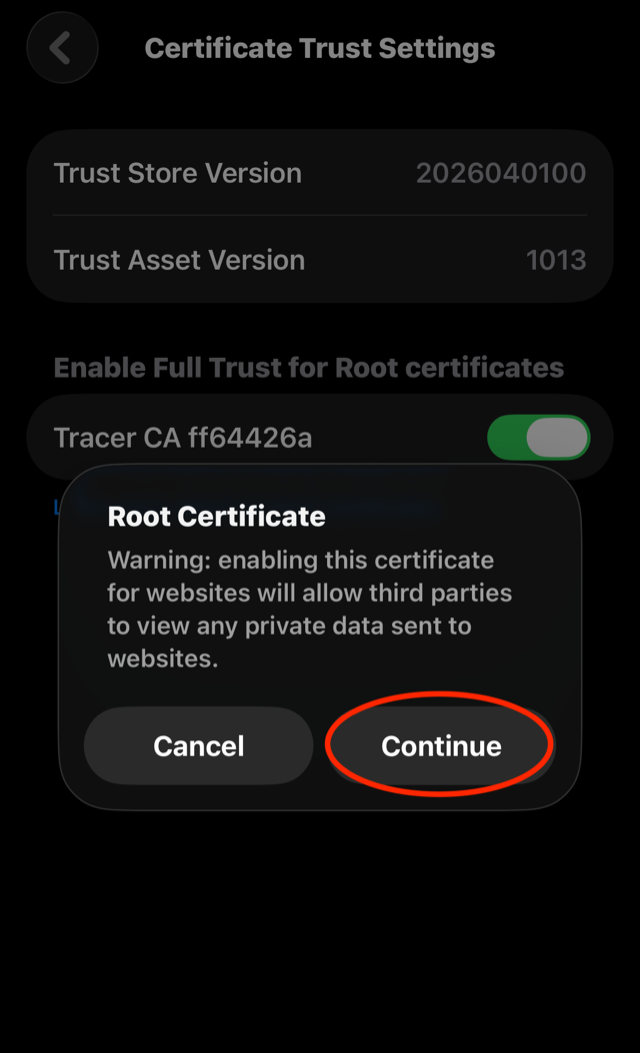
- iOS warns about root certificates — but this one was generated on your iPhone and the key never leaves it, so the only "third party" that can read anything is your device. Tap CONTINUE.
Step 3 — Allow VPN permission
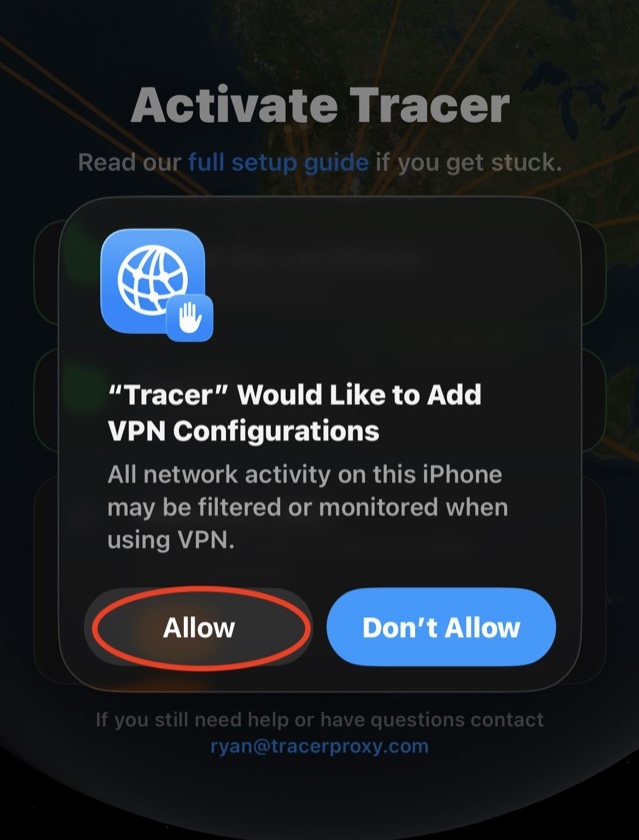
- Return to the Tracer app to allow VPN access.
Troubleshooting
NO "PROFILE DOWNLOADED" IN SETTINGS
The download was probably cancelled before you tapped Allow. In Tracer,
tap Install again and approve the download this time.
NO TOGGLE IN CERTIFICATE TRUST SETTINGS
The certificate hasn't been installed yet — iOS only lists installed
certificates there. Finish step 1 first.
AN OLD TRACER PROFILE IS LINGERING
If you've reinstalled the app or reset the certificate, remove any old
profile under Settings → General → VPN & Device Management, then
reinstall from Tracer's settings (Settings → Install Certificate).
CHECKMARKS AREN'T UPDATING
The app re-checks every time it returns to the foreground. Swipe back to
Tracer; in the app's settings you can also tap Recheck Status.
STILL STUCK? START OVER
In Tracer's settings, tap RESET CERTIFICATE, delete any old Tracer
profile from Settings → General → VPN & Device Management, and run
through this guide again from step 1.
Questions?
Email Contact — happy to help.